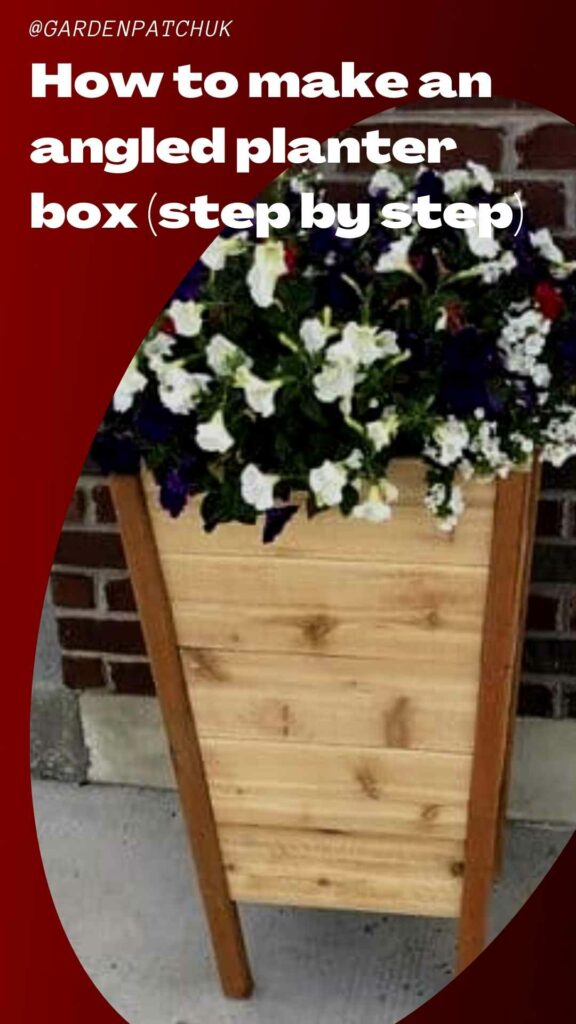
Tired of straight lines and average planter boxes? You could build an angled planter box instead.
Angled planter boxes come in a variety of shapes, styles and sizes, they’re also known as tapered planter boxes.
In this article, we’ll show you how to build a simple angled planter box from readily available materials in just a few hours. We’ll also share angled planter box plans and ideas that offer different takes on this project. Ready when you are!
How to build an angled planter box step by step
Getting the measurements and the cuts right is crucial to completing this project successfully. Once you’ve cut the wood, you can attach the trim to the sides and assemble the front, back, and bottom. Staining and adding landscaping fabric to your angled box will make it look better and last longer.
Find the detailed step-by-step instructions for this project below.
Note: Our instructions are for a single angled planter box that’s about 25 inches long and 8-inches tall, and that tapers from a width of 12 inches at the top to 8 inches at the bottom.

Add a touch of style to your garden with a tapered planter box. Image credit: @timberandfall
Materials and tools you’ll need
- Two 1 x 2 x 8 treated wood boards
- Two 2 ½ x 3 ½ x 6 wooden boards or pickets (or similar size)
- One 7 x 23 plywood sheet or board
- ¾ inch screws
- 1 ¼ finish nails
- ½ inch staples
- Landscaping fabric
- Sandpaper
- Stain
- Tape measure & marker
- Rafter square
- Mitre & circular saws
- Drill and bits
- Staple & nail guns
Step 1 – Measure and cut the front and back
Lay two wooden boards or pickets side by side horizontally on your worktable. Mark 12 inches at the top and 8 inches at the bottom.
Next, use the square to find the centre of the top line to guide your cut. To give the planter its angle, draw a line from the top marks to the bottom ones. In other words, connect the first top left 12-inch mark to the bottom 8-inch mark and repeat at the other end.
Tip: Adjust the angle of your mitre saw for the best cut. This could mean deviating slightly from the theoretical 16-degree angle.
Repeat this process to make the other side of the planter.
Step 2 – Cut the sides
After you’ve cut the back of the planter, cut the sides out of the remaining boards or picket.
Using a 90-degree angle on your saw, cut four 23-inch boards.
Step 3 – Make the trim strips
To make your angled planter look nice and level, you’ll have to cut some trim strips. These are strips of wood for levelling the wood pieces you’ve cut during the steps above and make them fit in nicely.
You need to cut eight 8.25-inch trim pieces in total. Cut four pieces with the depth side down and four with the width side down.
Step 4 – Get the bottom ready
You don’t need any special wood for the bottom. You can use leftover boards or anything similar. But the bottom should be at least half an inch thick and preferably more to take the weight of the soil.
Cut the bottom boards at 23 inches by 7 inches.
Step 5 – Add the sides to the angled trim
Now it’s time to put the sides and the trim pieces together.
Drill two pilot holes at the edge of each of the side boards with matching holes in the trim pieces. The trim will be holding the boards together. Use ¾ inch exterior screws to fix the sides.
Important: The trim should overhang the side boards by about half an inch. It should be flush with the top.
Each of the two sides of the planter box will need two trim pieces, one at each end. You’ll be using a total of four trim pieces.
Step 6 – Attach the front and back
Assemble the front and back of the angled planter box using the nail gun. Make sure the top of the planter is flush.
Step 7 – Add the bottom
Install the bottom boards, making sure they’re even. Fix them in place with the nail gun at an angle from both the front and the back.
Step 8 – Add the trim to the front and back boards
Nail the trim to the front and back sides. It should cover the holes you’ve made to fix the bottom boards.
Optional: You can also add four pieces of trim to the top of the angled planter box. Since in practice the exact dimensions for the top trim can vary, it’s best to cut and attach them last.
Step 9 – Stain the wood to make it last longer
Use a safe stain and apply it according to the instructions on the label. If you plan on growing herbs in your new angled planter box, make sure the stain doesn’t contain toxic substances.
More than protecting the wood, a stain will also make your planter box look finished.

Credit: Shutterstock
Step 10 – Add the landscaping fabric
You’re not quite done yet. After the wood stain dries, cut the landscaping fabric, and staple it inside the box. Fold and tuck in the sides, making sure they reach the top of the walls without coming out.
Tip: Depending on how thick the fabric is, you may want to fold it in two.
After the fabric is in place, add in the soil and plant some flowers, scented herbs or both!
Angled planter box plans and ideas to inspire you
It’s good to start with a simple angled planter box like the one we shared above. It will help you get a feel for the process and the minor adjustments needed as you assemble all the pieces, such as the trim at the top.
Once you’ve built your first simple angled planter box, you can try other designs. Here are some inspired angled planter box ideas and plans for you to explore:
Tall angled planters
Need to fill up an empty corner or create more privacy around a seating area? You could create some tall angled planters. Get the plans here.

Image: Pinterest
Angled cedar planter
Cedar’s a great wood for planters as it’s naturally resistant to rot. This cedar planter has a nice angle that adds a touch of style to it. It’s a worthy addition to just about any garden. Check out the plans for this angled cedar planter.

Image: Pinterest
Minimalist tapered wooden planter on legs
Got some spare wooden boards? Turn them into a minimalist tapered planter. Adding legs can make it look even taller without requiring as much wood. Plus, the legs may also help to improve drainage. Get the plans for the minimalist tapered planter.

Image: Pinterest
Raised angled pallet planter
If you need a large angled planter box for your garden or vegetable plot, this may be just right for you. You can build it from pallets, so it’s cost-effective. Check out the angled pallet planter box plans.

Image: Pinterest
Angled pyramid planter boxes
Angled pyramid planter boxes look anything but boring. You can make them from pallets or other wood leftovers. They don’t require too many materials either. Check out the plans for these pyramid angled planters.

Image: Pinterest
The bottom line
Building angled planter boxes requires a few more measurements than your average wood planters and you have to be careful with the angle of the cuts, too. But you don’t need any special skills or tools to build an angled planter box from scratch. So, if it’s time to add a new planter to your green patch, why not make it an angled planter?

Save this pin for later


