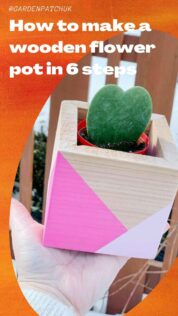
If you’d like to make your own wooden flower pot at home, this article will help you with the basics. We’ll be discussing the tools and supplies that you’ll need to make a simple, wooden cube planter, as well as an easy method to get you started. Here’s what you need to know:

Image credit: @samdcraig
How to build a wooden flower pot
Before you can start building your wooden flower pot, you will need to make sure you have the following tools and supplies handy.
Tools:
- Paintbrush
- Drill and drill bits (one for drilling holes, one for screwing in the screws)
- Pen
- Measuring tape
- Sander
- Mitre saw/handsaw and mitre box
- Safety glasses
Supplies:
- A 1×6 board with a length of 1.8 metres
- Wood stain
- 25mm screws
- Paper towels
- Glass jar
Method:
Here are the instructions for building a 15 by 15cm box, you can also check out this youtube video to see how it’s done:
Step 1: Cut the plank
For the first step, you’ll need a saw, measuring tape, pen and safety glasses. Place the plank on your workbench. Use the measuring tape and pen to draw a straight line for your first cut. Make sure the line is at least 2.5cm from the end of the plank to make it easier for you.
Set the saw to a 45-degree angle and cut into the wood starting on the line you just made. Once done, you can either flip the plank around or continue to the next cut. If you flip the plank around, measure 15cm from the edge you just cut and draw another line. Make sure the plank is nicely lined up and make the same cut starting at the line you just drew.
Continue until you have 4 pieces. Flip the plank around as required to get the cuts right.
Step 2: Form the box
Use the 4 sides you just cut and place a bit of glue where the sides fit together. Make a pilot hole with the drill and screw in the screw. You will need 8 screws in total. To make the box look neat, try to have two sides with screws, and two sides without.

Credit: Garden Answer
Step 3: Make the bottom
Measure the inside of the box you just created. It should be around 11 by 11 cm but it might vary slightly. Draw a line with your exact measurements on the remaining wood and cut straight down to create the bottom.
Step 4: Attach the bottom
Once done, place the bottom you just created on your workbench and place the sides over it. It should fit quite nicely. Create some pilot holes and screw the bottom into place. You will need a total of 4 screws to keep it in place.
Use the sander to smooth all the edges.
Step 5: Stain the wood
Use a paintbrush, paper towels and wood stain to complete this step. Start on the inside of the pot and work your way to the outside. Let it dry.
You could also use paint to decorate your planter.

Image credit: @trendybarn_interiors
Step 6: Fill your new plant pot
You have two choices when it comes to planting in this box. You can either use a plastic pot or glass jar that fits inside it or you can line it with plastic and plant directly inside. If you choose the second option, make sure to seal the inside of the box with rubber spray, varnish or plastic lining. You will also need to create some drainage holes in the bottom.
Conclusion
Now that you know how to build your own plant pot, you can create just about any shape or design you like. The possibilities are endless.

Image credit: @sweetpeasvacaville
You might also like: How to make a flower pot at home
FAQs
Are wooden pots good for plants?
Wood is the most natural material you can use for pots and it looks great. These pots retain moisture quite well which is great for some kinds of plants. Not all plants are suited to these pots, however, so make sure you do some research first.
How do you keep wooden pots from rotting?
The best way to keep wooden pots from rotting is to treat or seal the wood. You can do this by painting the wood with preservative, varnish or even sealing it with rubber spray. You can also use a plastic lining if you don’t want to paint the pot.
Do wooden planters need drainage holes?
Yes. Drainage will help to keep the plants inside the pot healthy. Despite needing water, most plants don’t like to stand in it for too long. To prevent problems like root rot, make sure your pot has drainage holes.

Save this pin for later
