A gazebo provides a great place to relax outdoors while keeping you protected from the elements. And it’s a smart investment as it adds value to your property. The question is where do you put it?
Lots of people dream of having a gazebo in the middle of their garden, but you can also attach it to the house. By doing this, you’re basically extending your living space.
Here’s all you need to know about building a wooden gazebo attached to a house.

Credit: Norfolk-landscapes
Building a wooden gazebo attached to a house step by step
Before you get down to business, you need to plan the whole operation. This will save you a lot of headaches, not to mention time and money.
Step 1 – Pick the right location
If a gazebo is attached to the house, it makes sense to be able to access it easily from the inside. The gazebo should be close to the front door or better yet, right in front of a patio door.
At the same time, you need to choose a spot that gets at least four hours of shade each day. If you place the gazebo in a spot where it gets full sun all day long, it will be too hot during summer, so you won’t be able to enjoy it fully.
Another thing to keep in mind is to check with local authorities and find out whether you need planning permission. If your house is very close to that of your neighbour, you might not be allowed to build a structure that blocks their view.
Step 2 – Choose the right gazebo
Think about your gazebo in terms of size and shape. Make sure you have a flat surface that’s large enough to accommodate the model you have in mind. If you want to build a gazebo on wooden decking, make sure it won’t block any access routes.
As for shape, you’d better go with a square or rectangular gazebo as straight lines make the job of attaching the structure to the house wall so much easier. A round or octagonal gazebo might look fancy, but once you start building it, a lot of practical difficulties may get in the way.

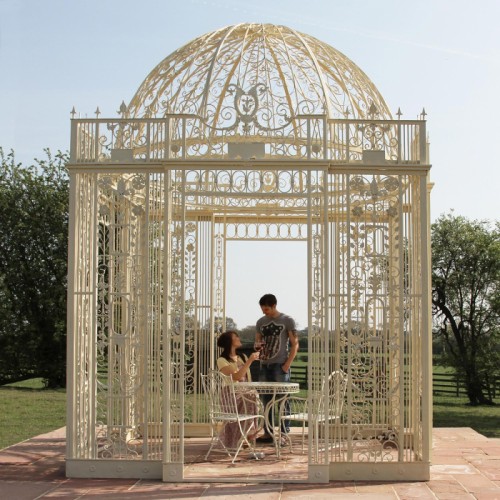
A round cupola gazebo looks impressive but it’s not really a DIY job. Credit: Shutterstock
Step 3 – Build from scratch or buy a kit
Should you buy a gazebo kit or build a gazebo from scratch? Both options have their merits.
When you order a gazebo kit, it comes with all the materials needed, plus assembly instructions. On the other hand, you’ll end up paying for materials you probably won’t need if you’re going to attach one side of the gazebo to the house. Also, you might have to alter the roof design, so it fits against the wall.
Building your own gazebo will require some extra planning, but it’s more easily customisable, and you’ll only buy the parts you need. On the other hand, if anything goes wrong, you can’t blame the manufacturer—it will be your fault and you won’t hear the end of it.
If you do muster up the courage to do everything on your own, here’s how to proceed:
Step 4 – Build a wooden gazebo attached to the house
This guide refers to building a simple square gazebo. Draw an 8 x 8 ft square on the deck to mark out where the gazebo will go. If you’re building a rectangular gazebo, adjust the plan and the materials needed accordingly.
Here’s a quick shopping list to get you started.
Materials you’ll need:
- Posts: 8 ft long 4×4 wooden posts – 4 pieces
- Lower Beams: 8 ft long 4×4 posts – 4 pieces
- Upper Beams: 8 ft long 4×4 posts – 4 pieces
- Tube Forms/Containers
- Concrete
Tools you’ll need:
Step 5 – Anchor the posts
This is an essential step if you don’t want to see your gazebo leveled to the ground during a storm. If you’re building the gazebo on a concrete platform or over the ground directly, the best option is to drill or dig holes and use tube forms large enough to accommodate the posts.
Place the posts inside the tube forms, pour some concrete, and let it dry, making sure the posts are perfectly vertical.
More on this: How to anchor a gazebo to concrete patio
If you’re building the gazebo on a wooden deck, too much drilling might ruin it. In this case, you can use containers—concrete ones or large pots—to anchor the two posts that are placed away from the house wall. Fill the containers with rocks and earth, or pour concrete if you want to make sure the posts stay in place.
The other two posts can be attached directly to the house wall. If the outer walls are made of wood, you can screw the posts in place. If you have a masonry or concrete outer wall, you’ll need a power tool to drill holes in it, then attach the posts with screws. For best results, place the screws some 6 inches apart.
Step 6 – Build the upper part of the gazebo
For this step, you can get creative. You’ll have to place support beams between the posts. If the height of your deck door allows it, place all four lower beams.
Measure and cut the beams with the circular saw so they fit between the posts. On the other hand, if there is no space to fit the lower support beam in front of the deck door, just forget about it.
Since the posts are already attached to the wall, the structure is sturdy enough. It’s best not to leave out the upper beam though, as you need that to support the roof of the gazebo.
Step 7 – Build the balusters
This part depends on the type of gazebo you want. If you want the outdoor structure to be easily accessible from any part of the garden, you can do without balusters and railings.
If you prefer an enclosed space, decide where exactly you want balusters and where you don’t. In other words, do some measuring and only buy the pieces you need,
How to attach a gazebo to a house the easy way
If you already have a wooden gazebo in your garden and want to move it close to the house, it’s an even easier job. Hopefully, you won’t need to take it down completely. But for that to happen, you’ll need some help—think of some strong friends who can help you move the structure as it is.
Step 1 – Remove the anchors
No matter what type of anchoring you used on your wooden gazebo, it’s time to remove it so you can move the structure close to the house.
Step 2 – Remove unnecessary joists
Decide which side of the gazebo will go against the house wall and remove the outer joist. Remove the inner joist if there is one. An electric screwdriver would be most helpful at this point. Any beams you take out will only make it easier for you to move the gazebo around.
Step 3 – Attach the wooden gazebo to the house
Move the gazebo to the selected spot and place it into position. The support poles should lean against the walls. If parts of the roof stick out, cut them with the electric saw.
Make sure to anchor the outer poles before you attach the inner poles to the wall. You don’t have to attach the poles to the wall if you don’t want to. It’s safe enough to anchor just the upper and the lower joists to the wall.
For that, you’ll have to drill holes along the central line of the joists, approximately 6 inches apart. To attach the joists to the wall securely, use an impact wrench and lag bolts.
Seal the upper joist with silicone to prevent water from the gazebo roof from seeping in and damaging the wall.
What are the advantages of attaching a wooden gazebo to the house?
When a gazebo is placed against the wall, you’re more protected from the elements. But the most important benefit is that you can use this space in many ways.
- A gazebo you can walk into from your living room can be used as a dining space on a warm summer night. It’s great if you like entertaining guests and need more space.
- At the same time, your outdoor furniture can last longer under a gazebo. You won’t have to worry about rain ruining your rattan chairs or outdoor cushions.
- If you work from home, you can turn your gazebo into an outdoor office, as you have electric outlets close by in the living room and a strong Wi-Fi signal.
- You can save on materials if you turn the wall of the house into a gazebo sidewall.
- Last, but not least, if the gazebo is set up right next to the house you can let the kids play there and keep an eye on them at all times.
As a recap, if you want to build a gazebo attached to the house, find a good location and secure the posts and joists to the wall. For the rest, it’s no different to building a gazebo in your garden. To move an existing gazebo against the house wall, all you need to do is remove the rim joists and screw the lower and upper ones in place.
So, isn’t it about time you got to work?

Save this pin for later


