Are you looking to add some colour to your decking? If you want to liven up your deck, you can’t go wrong with a few well-placed planter boxes filled with brilliantly coloured flowers and foliage.
Planter boxes can be quite expensive but if you haven’t got the budget for one, why not build your own? You don’t even need to be an expert at woodwork. If you’re up for the challenge, keep reading.

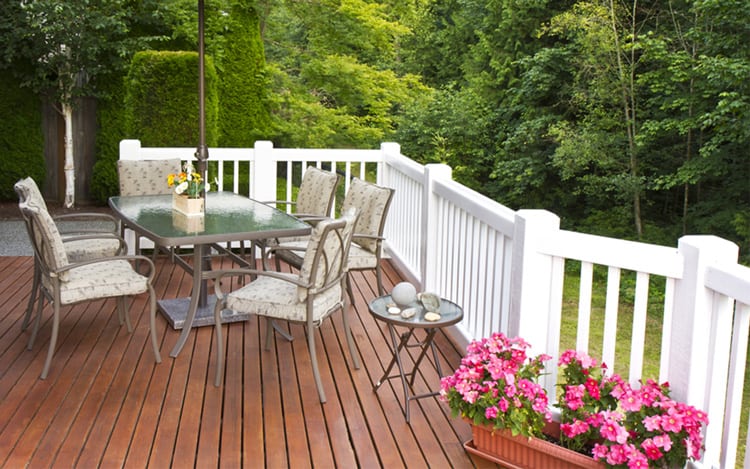
Liven up your deck with colourfully filled planter boxes. Credit: Shutterstock
How to build a planter box for a deck
Building a DIY deck planter box starts with deciding on a design. There’s a wide range of options including free-standing planter boxes, built-in planters and rail planters. You can search the internet for the most cost-effective planter box plans and ideas if you’re working with a limited budget.
If you’re going for simple yet attractive, then we’ve got the right planter box plan for you. Keep reading to find out what you need to build it.
Tools and supplies
Before you get started, make sure you have the following tools and supplies to hand:
Tools:
- Saw
- Drill and screwdriver head drill bits
- Spade bit
- Sander and sandpaper
- Measuring tape
- Pencil
- L-square
- Paintbrush
- Carpenter stapler
Supplies:
- 1×12 Wooden planks
- Screws
- Wood preservative or sealant
- Plastic lining
- Wheels (optional)
Method: Building a deck planter box
Once you have all your supplies and tools ready, it is time to begin building. Here’s how to do it:
Step 1: Take measurements
Before you can do anything, you’ll need to decide how big you want your planter to be. Keep in mind that you’ll need to be able to move it around the deck once it’s assembled.
These instructions are for a planter 120cm long, 30cm high and 30cm wide. You’ll need to measure out two sides that are 120cm long, two that are 30cm long and an odd one out that we’ll explain later.
To take the measurements, grab your measuring tape, L-square and pencil. Start by measuring out a 120cm section. Make a mark with your pencil and use the L-square to draw a straight line to cut along later.
From that line, either measure out a 30cm section or another 120cm section depending on how long your planks are. Continue measuring until you have two 120cm sections and two 30cm sections.
For the last section, measure out 120cm and draw a line. Now you can add your two short sections together and line them up next to the line. Doing so should reduce your 120cm section. You can use the planks as a ruler and draw a new line. Erase your previous line.
You should now have a section that is around 115cm long. This section will make up the bottom of the box. The reason for the difference in length will be explained in step 3.

Carefully measure your wooden planks before cutting. Image credit: Shutterstock
Step 2: Cut the wood
This step requires a saw and a sturdy workbench or something similar to work on. Place the planks in such a way that the line you want to cut hangs over the edge of the table. Take your saw and start cutting along the pencil edge you drew.
Once done, layout your box to make it easier to assemble. Start by placing the odd length plank on the ground or table. Arrange the other sides around it so that the long pieces line up with the long sides of the bottom and the short piece with the short sides.
Step 3: Assemble the planter
The best place to start the assembly process is by attaching a 120cm side to the bottom. Before you start drilling holes and placing glue, make sure to leave an indent equal to the width of the planks on both sides where the short 30cm sides need to go. You can do this by using a short side and a pencil to make a mark on the 120cm side. Do this on both 120cm sides to get a good idea of where the bottom should be attached.
Once done, you can place some wood glue between the bottom and the side for extra security before adding screws. Insert the screws and use the drill with a screwdriver head drill bit to secure them in place. Do the same with the second long side. You might need up to 5 screws per side to make sure the long side is properly secured.
When done, place the box upside down. This will make it easier to line up the short sides. Make sure the surface you’re working on is level. Next, insert the short side into the gap that’s left. Line it up nicely with the other two sides that are already attached and screw them in place.
You will need three screws to attach the side to the bottom and three more per side to attach it to the two long sides. You can also place wood glue anywhere the wood joins. Do exactly the same for the other short side.

Fill your DIY planter box with your favourite blooms, herbs or vegetables. Image credit: @gatheredliving
Step 4: Add the finishing touches
As a finishing touch, you will need the spade drill bit to create drainage holes in the bottom. Drainage holes are very important for keeping your plants alive and healthy. Make sure to create at least 3 holes.
Once that is done, use the sander and sandpaper to smooth over any rough edges and prepare the wood for the finish. Make sure to remove all the wood dust after sanding.
Take your wood preservative and paintbrush and apply a generous coat to your new planter box. The preservative is very important since your planter will be in direct contact with moist soil and water all the time. Leave the first coat to dry before applying at least two more coats.
When dry, use some wood glue or a staple gun to attach a plastic lining to the inside of your planter box. The lining will protect the wood from being constantly moist. Remember to make holes in the plastic directly over the drainage holes you created.
If you like, you can attach wheels to the bottom of your planter to make it easier to move around the deck. You can do this by screwing a wheel onto each corner to stabilise the planter. You can also add a wheel in the middle to support the bottom if you like.
Congratulations! Your planter can now be moved where you like and filled with soil and the plants of your choice.

Paint or stain your finished planter box and fill with structural plants and bright flowers. Image credit: Premier Wooden Planters
FAQs
Do I need to line my wooden planter box?
Liners will prolong the life of your planter box. You do not necessarily need them, but they will definitely help a lot in the long run. Water and constant moisture cause wood to rot faster. Using liners will slow down this process.
What kind of wood is best for my planter box?
Cedar is best. It is a cheap wood that is naturally rot-resistant. When this wood gets wet, it won’t warp and spoil the look of your planter.
Can you put a planter box on a deck?
As long as the planter box is raised off the ground, any water that drains from your box will evaporate and run off quite quickly without causing damage to your deck. Boxes that are flat on the deck can cause water stains and rot due to the constant moisture build-up under the box.

Save this pin for later


