Galvanised planter boxes are a smart choice if you don’t have enough space in your garden, or no garden at all.
Building one is easy and inexpensive. There’s not much that can go wrong if you take it step by step. Here’s how to do it.

Credit: Shutterstock
How to make a galvanised metal planter box step by step
If you want to do a great job, start by making a simple plan. Draw your planter box on paper to determine exactly how much wood and galvanised steel you’ll need. No special drawing skills are required.
Note: The following instructions are for a simple rectangular galvanised metal planter box.
Materials and tools you need
- 4 x long pressure-treated or cedar wood lumber pieces (sides)
- 4 x short lumber pieces (sides)
- 8 x lumber pieces (corners)
- 2 x short lumber pieces for support (large planter boxes only)
- 5 x corrugated steel sheets
- Circular saw
- Electric screwdriver
- Galvanised screws or wood screws
- Sheet metal snips
- Protection gloves and goggles
Step 1 – Measure and cut the materials
If you’ve got any leftover lumber pieces from another DIY project, you could use them to make your planter box. If you haven’t, head out to your local DIY store.
Measure up the space where the box will go and determine the length and width of the planter box. You’ll need 4 long lumber pieces and 4 short ones to create the rectangles that form the base and the upper rim of the box.
In terms of height, consider the type of plants you want to grow in the box. If you’re thinking about plants that grow big roots, you’ll need to give them enough space and make a tall planter box.
You’ll need 8 lumber pieces for the corners of the planter box, plus another 2 pieces to go in the middle of the longer walls, for extra support. For a small box, you can do without the 2 extra pieces.
Tip: You can choose pressure-treated fence posts, or you can buy cedar wood posts. Pressure-treated posts are more affordable, but cedar wood is more resistant.
While you’re at it, measure up for the corrugated steel sheets that will form the walls. You’ll also need one sheet for the bottom of the planter box.
Step 2 – Build the wooden box
If you’ve bought long lumber pieces, make sure to measure twice before you start cutting. Start by working on the sides of the planter box. Cut the 4 long beams and the 4 shorter ones.
You need to screw those to the vertical beams that support the walls. Place all the wood pieces on a flat surface and assemble the sides of the box. When you have the four sides ready, screw them together using pocket hole screws.
You’ll also need to add a few bottom blocks. Otherwise, the weight of the soil might damage the bottom sheet and make it fall out.
Now you have something that looks like a box, but there’s still more work to be done.
Step 3 – Build the galvanised steel walls
You’ll need sheet metal snips to cut the galvanised steel sheets to measure. Start with the bottom sheet and drill a few holes into it to allow excess water to drain.
Next, fasten the corrugated steel sheets that make up the walls. Cut each sheet so it fits inside the box. Attach it to the frame with wood screws, both on top and on the bottom.
Line the bottom and your box is now ready to use!
Galvanised planter box ideas
The best thing about galvanised planter boxes is that you can make them any size or shape you want. You can style them too. Here are some ideas to get you inspired.

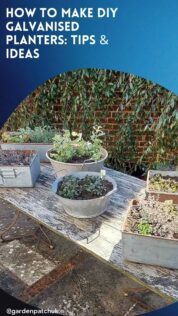
Get creative with different sizes and styles of planter box. Image credit: @thepinkhatgardener
Aged galvanised planter boxes
If you want to add a rustic look to your planter boxes, you can age the galvanised steel sheets. You don’t have to buy special products, all you need is a mixture of salt, vinegar, and hydrogen peroxide.
Get a large bowl and add the ingredients in equal parts: 3 spoonfuls of large grain salt, 3 of vinegar, and 3 of hydrogen peroxide.
Put on a pair of safety gloves and use a rag to cover the sides of the planter box with the mixture. Rub it in as best you can. The longer you leave the mixture on, the better the ageing effect.
You can also decorate a planter box with knotted rope, coloured ribbons, or by glueing decorative elements to it.
Galvanised raised bed planter
If you want to grow a variety of plants in your garden, raised beds are the perfect solution. Galvanised raised bed planters allow you to grow plants with different soil and watering needs close to each other. They’ll help you to make the most of the available space.
You can place several planter boxes along the walls of the house or against the fence. Another idea is to place them on either side of a garden path or driveway. You could also arrange them in a geometric pattern to create a small maze in your garden. Make sure all the boxes are easily accessible.

Make the most of your available space with steel raised planters. Image credit: @thegreenseeddesign
Galvanised planter box on the deck or terrace
Placing a couple of galvanised planter boxes on the deck is a great idea when you don’t have much of a garden. All that green makes for wonderful decor.
Just make sure the deck is water-resistant as the draining water might damage it. If you don’t want to take any chances, forget about making holes in the bottom sheet and adjust the quantity of water you use so the roots don’t rot. On a concrete terrace, a bit of drainage water won’t be a problem.
Windowsill planter boxes
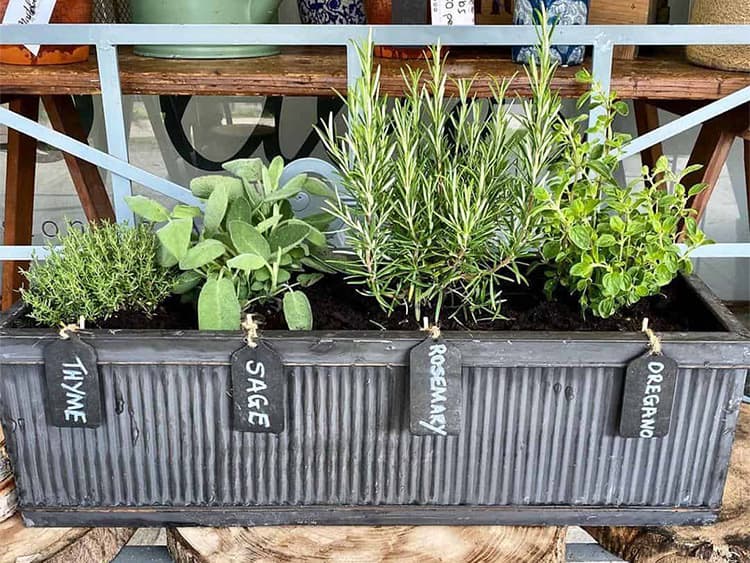
Do you have large windowsills? You can also place a few galvanised planter boxes on them. The only thing is that you can’t make them too tall. Use planters for herbs or flowers that don’t grow big roots.

Adorn large windowsills with galvanised steel planters. Image credit: Waitrose
Takeaway
If you want more space for your gardening projects or want to add some greenery to a balcony, you can easily build a galvanised planter box using a few pieces of wood and corrugated steel sheets.
You can make it big enough to grow vegetables in the garden or small enough to fit on a windowsill, it’s your call!
You might also like: 10 creative planter box ideas that anyone can do

Save this pin for later


