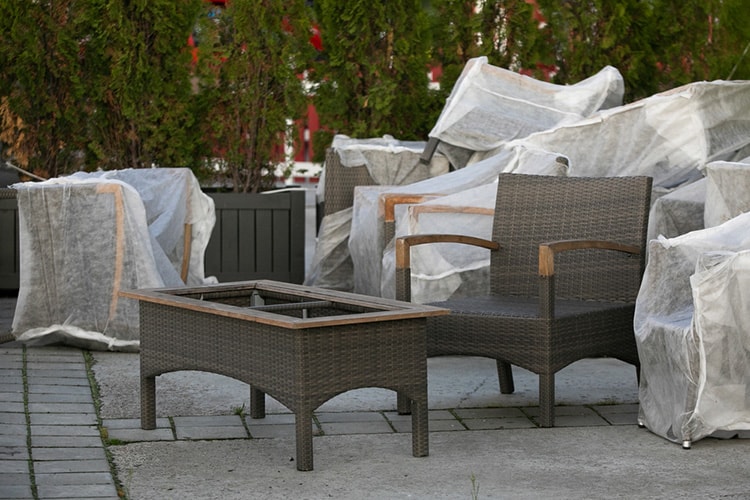
Spring rainfall, summer sun, autumn wind and winter snow are not really kind to your outdoor furniture. If left uncovered, your brand-new garden chairs, tables, and loungers can look worn out before long.
Instead of opting for store-bought garden furniture covers, you could make your own. You will learn a new set of skills, create your own fitted covers, and also have some fun along the way.

Credit: Shutterstock
Plus, you can choose fabrics and patterns to suit your style, whether it’s colourful or subtle. And most of the time, you’ll be able to save some money too.
Read on to get started and protect your garden furniture for many years to come…
DIY garden furniture covers in 7 easy steps
In just 7 steps, you can transform a piece of fabric into a useful cover. Start by measuring your furniture, then choose and cut the fabric, and finally sew the pieces together. It’s as easy as it sounds.
Things you’ll need:
Before you start measuring, cutting, and sewing, gather all the things you’ll need. That way, you won’t have to interrupt your work while you’re at it.
- Fabric material
- Elastic piping
- Nylon thread
- Tape measure
- Sewing machine
- Tacking or safety pins
Step 1 – Measure your furniture
Before grabbing a pair of scissors, take the time to measure your furniture. This will help you determine how much fabric you will require per piece.
Start by measuring the length of your furniture from top to bottom. Next, measure the distance between both arms for chairs. For tables, measure the length. Finally, measure the width of your furniture.
Note down all these measurements. Repeat the procedure for each of your garden chairs and tables. You may want to double-check the measurements just to be sure the numbers are accurate.
Step 2 – Choose your fabric
You can use any outdoor fabric of your choice. But, make sure it’s durable while also contributing to the look and style of your space.
You can opt for polyester, which is a water-resistant fabric. It’s also lightweight and does not make your outdoor furniture too bulky. Polyester is quite affordable too. Another fabric to consider is PVC vinyl. It’s super durable and easy to work with. You can also use tarpaulin.

Kittens approve of tarpaulin; credit: Shutterstock
Step 3 – Cut the fabric
Your measurements will come in handy here. Make sure you leave enough edging for the seams. Place all the cut pieces together and carefully tack them with the pins.
Once the pieces are all put together, drape them over your furniture and see that they fit well. You can make minor alterations here, like cutting more fabric pieces or re-tacking.
Step 4 – Sew the pieces
Now, sew the pinned fabric pieces together. Use your sewing machine for this—hand sewing is not as strong, plus it will take much longer.
Important: See that the thread you’re using works well in outdoor spaces. Nylon thread is a good option if you’re not sure which one to go for.
Once the seams are sewed together, test the cover on your furniture before you move on to the next step.

Using a sewing machine will save precious time (just watch your fingers!) credit: Shutterstock
Step 5 – Add the elastic piping
Piping means another layer of protection for your covers. So, carefully sew the elastic piping into the seams. Doing so will offer a little elasticity and prevent tearing when you pull over the covers. Piping will also give your covers a nice form-fitting tightness.
Tip: Trim off the edge of the piping if there’s any poking out from the seams.
Step 6 – Add extra features
You can add features like tie-around cords and zips to your covers, too. Or experiment with elastic seams. These will provide greater protection to your furniture, especially if you live in windy areas where the threat of your covers blowing with the wind is ever-present. These are just extra features and your covers are functional without them.
Step 7 – Sew the seams
While sewing the seams, see that the bottom edges of the cover are sewn too, so they won’t tear or fray. Test the cover fitting and make minor adjustments if needed.
Once you’re happy with the final look, coat the seams with wax to keep water from seeping inside. Alternatively, you could use a waterproofing spray or solution.
Your garden furniture covers are now ready. If you’re happy with the results, it’s time to make more!
How to choose the right fabric for your garden furniture covers
First and foremost, see if the fabric is waterproof. It should be able to handle downpours and not drizzles. Waterproof fabric typically has better water resistance than fabric you waterproof yourself.
At the same time, the fabric should also be breathable so it doesn’t trap moisture underneath and make your furniture mouldy. The last thing you want is for your garden furniture to start turning green.
Consider also the weight of the fabric. If it’s too heavy, it will make your furniture bulky. If it’s too flimsy, the wind will carry it away. Opt for something in between.
Keep these three factors in mind and you’ll be able to easily choose the right fabric for your outdoor furniture cover.
You’re all covered
It’s a fact: wooden furniture can decay, plastic fade, iron rust, and wicker dry out and crack. But it doesn’t have to be that way. You can make your own custom covers and rest assured that your furniture’s alright even under a scorching sun or heavy downpour.
What’s more, your furniture covers don’t have to be all boring greys. Experiment with colours and textures. And just have fun while cutting and sewing.
Your garden furniture will appreciate your efforts by staying nice and clean for many years to come.

Save this pin for later


