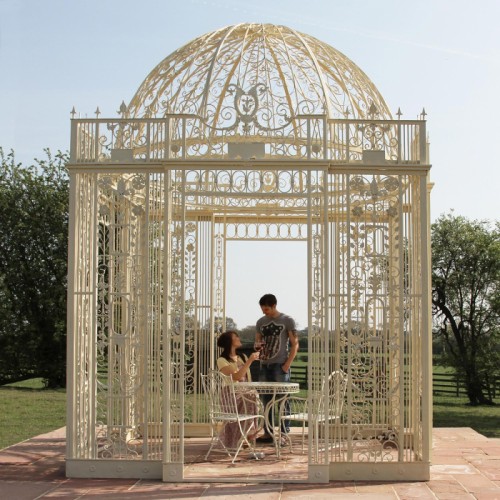
Who wouldn’t like an octagonal gazebo in their garden? It looks way fancier than a regular square one, but, if you’re planning to build one yourself, it might pose a big problem. How do you build an octagonal gazebo roof?
If that’s what’s stopping you from building the gazebo of your dreams, we’ve got you covered. This post will guide you through the steps of building a great-looking roof over your octagonal gazebo and it’s not as complicated as it might seem.
Anyone with basic DIY skills can do it—it really is only a few hours’ job. Of course, you’ll need to get the right tools and all the materials so your work won’t be interrupted by an unscheduled trip to the store.

Credit: Shutterstock
How to build an octagonal gazebo roof step by step
This guide is intended for a 10 ft octagonal gazebo where each side of the octagon is 2 ¼”. If you build a larger or smaller gazebo, you’ll need to adjust some measurements, but the basic plan is the same.
Step 1 – Gather your materials
The roof doesn’t require as many materials as the gazebo itself, so it won’t be much of an expense. And most of the time, building it yourself is still cheaper than ordering a kit and putting it up.
Here are all the materials you need to get ready:
- Top rails: 8 pieces of 2 x 4 lumber with a length of 57 ½”
- Rafters: 8 pieces of 2 x 6 lumber – 102”
- Top post: One 12 ft 6 x 6 lumber piece
- Roofing slates (2 x 6) or Plywood sheet
- Tar paper – 200 sq. feet
- Asphalt shingles – 200 sq. ft
If you’ve already installed the top railings, so much the better. You won’t need to buy another 8 pieces of lumber.
Step 2 – Get your tools
The task doesn’t require heavy tools, so you probably have what you need already. Here’s what you need to have at hand:
- Hammer
- Electric screwdriver
- Mitre saw
- Tape measure
- Framing square
- Screws and bolts
- Stapler
- Safety equipment (gloves & glasses)
Tip: If you don’t have all the tools, try to borrow from a friend instead of buying. The expense isn’t worth it if you’re not big on home improvement projects. Plus, asking around for tools is a great way to enlist the help of your friends. You can build the roof on your own, but many hands make light work.
Step 3 – Put up the king post
For square or rectangular gazebos, a king post is optional. For an octagonal gazebo, it’s a must.
The king post not only supports the weight of the roof, but it’s the central element that you attach the rafters to. If you already have the king post in place, good for you. Skip to the next step.
If you didn’t put in a king post while building the gazebo, don’t worry. You can still do it at this stage. But you’ll have to figure out a way not to damage the floor of the gazebo.
At this point, taking out the decking to dig another hole for the king post is out of the question. Instead, you can anchor the king post using a concrete container or a large flowerpot.
- Determine the centre of the octagon, mark the spot on the floor, and place whatever container you chose in place.
- Use your tape measure to make sure the king post will be right in the middle if you want your roof to be perfectly symmetrical.
- Place the lumber piece right down the middle of the container and have someone hold it while you pour some concrete. You can also fill the container with rocks and earth, but concrete keeps it in place better.
- Don’t forget to plumb the post to make sure it’s perfectly vertical.
- You should leave the concrete dry for at least 12 hours.
Tip: Choose the container carefully as it will sit right in the centre of your gazebo—you don’t want it to be an eyesore. The best thing is to leave some space and fill the upper part with garden soil. Then you can plant a nice hanging plant with long leaves to cover the concrete container. Alternatively you can paint it in warm colours that would go well with the colour of the floor.
Step 4 – Framing the roof of the octagonal gazebo
If you didn’t put up the top railings, now is the time to do it. It’s not difficult as you’ve already had to install the floor railings.
- Get the rafters and cut them at an angle of 63.5 degrees at both ends, using a mitre saw. Each rafter will be attached with one end to a perimeter post and the other to the king post.
- Start by working on the king post part. You’ll have to put 3 ½” screws into the main post and drill pilot holes in each rafter.
- Once the rafters are attached to the king post, secure them to the perimeter posts. Before you do that, put them into position and examine the structure so you know everything looks good.
- To secure the rafters, you’ll have to make a notch in the top part of each perimeter post. The notch should be wide enough to fit in the rafter.
- Use 4” carriage bolts to attach the rafters to the perimeter post. Fix them as tightly as possible as the roof should be rigid to sustain the weight of the roof and not slant in any direction.
Step 5 – Build the bottom layer of the roof
You have two options for this part. You can use either slats or plywood boards.
If you go with slats, start from the top railing and work your way up to the part where the rafter meets the king post. Cut the slats to measure and attach them to the rafters using 2 ½” galvanized screws.
Building the bottom layer with plywood might be a bit easier. You need to measure the sides of a section carefully. All 8 sides are the same, so you can proceed to cut 8 triangular plywood pieces. To cover the roof, join the plywood sheets to the rafters with 1 1/2” nails.

An octagonal gazebo roof is a thing of beauty. Credit: Outdoor Living Today
Step 6 – Waterproof the roof
A pitched roof has excellent water draining properties, but you still need to insulate the roof with tar paper. Cut 8 triangles of tar paper using the same measurements as in the above step.
No matter what you used—slats or plywood—cover the surface of the roof with a sheet of tar paper. You can attach the tar paper with nails, or you can staple it in place.
Tip: If you want to make sure water won’t seep through, cut each side of the triangle one inch larger and place the tar paper sheets so they overlap.
Step 7 – Shingle the roof
Your job is almost done. After all the hard work, shingling the roof will be a breeze. Work with 3-tab shingle strips.
Start from the top railings and work upwards. Place the shingles with the tabs upwards, secure them with galvanized nails, and make sure the rows overlap to make the water drain faster.
Tip: For a professional result, you should put two layers of asphalt shingles on the roof. The inner layer should be placed with shingles facing upside down, while on the top layer the shingles go with the right side up.
More on this: How to Shingle a Gazebo Roof
There is another option for shingling the roof. You can use cedar shingles, which need to be placed individually. This requires a bit more work, but the end result is spectacular. Also, cedar shingles are more durable than asphalt shingles.

Cedar shingles require more work but it’s worth it. Credit: Shutterstock
Step 8 – Cover the roof centre
You need to pay special attention to the top of your gazebo roof. The part where the rafters meet the king post needs to be perfectly insulated. Cover the top spot with an extra layer of tar paper.
When you’ve finished shingling, cut a round piece of lumber and place it right on the top of the gazebo. To make your gazebo stand out, place a small wooden or acrylic decorative element, a bird, a star, etc. on top of it. But don’t use anything too heavy, the roof weighs enough as it is.
The bottom line
With the right materials and tools, you can build the roof of an octagonal gazebo in less than a day. Since it’s heavier than a square one, you’ll need to install a king post right in the middle of your structure—that’s crucial.
Work with care and see how everything fits before screwing the lumber posts in place. Make sure the roof looks symmetrical. You can take a part down if it doesn’t look quite right, but that’s a lot of extra work. Plus, beware of drilling more than one hole in a post if you don’t want to see the wood split.
That’s about it. Now to work, chop-chop!
If you’ve changed your mind about an octagonal gazebo check the rest of our gazebo ideas for more inspiration.

Save this pin for later


