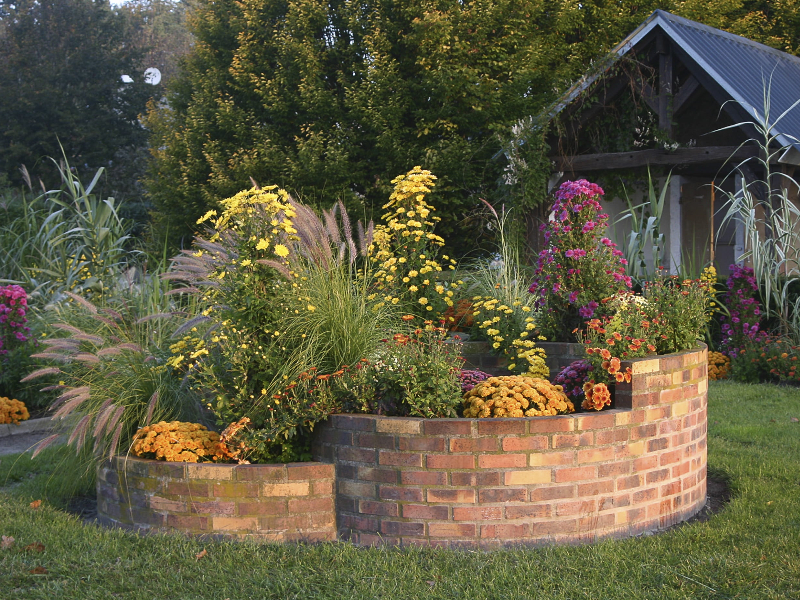
Are you thinking of creating a permanent brick planter on your patio or in your garden? Brick planters are fairly simple to build as long as you follow a few critical instructions. In this article, we’ll look into how to build a basic brick planter box.

Image credit: Piqsels
Let’s get right to it and get you building.
What you’ll need
Building a brick planter can’t be done without the correct tools and supplies. Here’s what you’ll need for this project:
Tools:
- Spirit level
- Brick hammer
- Shovel
- Brick trowel
- Pointing trowel
- Measuring tape
- Wheelbarrow
Supplies:
- Mortar
- Bricks
- Rope
- Metal rods
- Concrete slab/concrete for the foundation
- Safety glasses
- Gloves
How to build a brick planter box:
Once you have all the tools and supplies you’ll need for this project, it’s time to get to the fun part. Let’s start building your brick planter.
Step 1: Create a foundation
To do proper brickwork, you’ll need to first prepare a foundation for the bricks to be laid on. To do this, you’ll need a shovel, measuring tape, a concrete slab and a spirit level.
It’s easier to use a concrete slab as a foundation than to lay a whole new floor. You can still use concrete to create your own foundation, however. Just make sure that the foundation is laid at least 150 mm deep and extends about 100 mm beyond each planned wall.
This will ensure that your brick walls will have a solid base which in turn prevents future problems like cracks and collapsing walls. If you decided to make your own foundation, you’ll need to let the cement dry before you can continue.
Remember to make sure that the foundation is level by using the spirit level before you let it set.
Step 2: Mark the starting point
Before you can lay any bricks, you’ll need to plan your planter. Use some chalk and mark the starting point. Use a measuring tape to make sure the planned wall won’t get closer than 100 mm from the edge of the foundation.
Once done, either mark the ground with the chalk in a straight line or use a string attached to two metal rods to create the line for you. The rods can be knocked into the ground on either side of the foundation.
Step 3: Lay the bricks

Image by олег реутов from Pixabay
To lay the bricks you will need to mix some mortar. Keep your spirit level handy and get your brick and pointer trowels out. You can mix the mortar by following the instructions on the packet. Use a wheelbarrow or similar container to do the mixing in.
Make sure to only add small amounts of water at a time, you don’t want to accidentally make the mortar too runny. Once done, use your brick trowel and scoop out some mortar.
Create a line of mortar on top of your foundation in line with the chalk or string you set up beforehand. This mortar layer should be around 15 mm thick. Start in a corner and place your first brick. Make sure to hammer it lightly to set it into the mortar. Place your spirit level on top of it and hammer the brick lightly until it is level.
Place a bit of mortar on the side of the next brick and place it flush against the first brick with the mortar filling the hole between the first and second brick.
Lightly tap the second brick until there is a 10 to 15 mm gap filled with mortar between the bricks. You’ll also need to tap the second brick in place until it is level with the first. Keep your spirit level handy.
Keep placing new bricks in this way until you’ve completed the perimeter of your new brick planter.
If you want to create drainage holes, simply skip placing mortar between the bricks in the first layer. Do this to every third or even fourth brick to avoid creating a weak foundation for the rest of the planter.
Step 4: Create the planter walls
After you’ve built the first layer, you can continue with the rest. Lay some mortar on top of the first layer and set the brick in place on top of it. Make sure the brick doesn’t line up with the one below it, however, they have to be staggered. Brick walls with bricks that line up perfectly are weak and easy to crumble. Staggered bricks strengthen the structure.
Place a bit of mortar on the side of the second brick and put it in place. You’ll also need to hammer these bricks in place until they are level. Make sure the mortar level stays the same throughout the whole process. Usually, the layer between the bricks should be around 10 to 15 mm thick.
Make sure to check that your wall is perfectly vertical every now and then. You can do this by placing the spirit level vertically against the wall to check that the wall isn’t bent out of shape.
Remove any excess mortar from the sides with the pointer trowel to create a neat finish between the bricks. This extra mortar can be reused to lay the next brick in place. Continue stacking the bricks layer by staggered layer. Once done, make sure to remove any excess mortar and create a smooth finish.
The planter should be around 600 mm high to prevent the bricks from being pushed out of shape by the soil. Now you’ll need to leave the planter alone until the mortar has completely dried. The packaging should be able to tell you how long to wait.
Step 5: Fill your brick planter
It’s always a good idea to fill your planter with something like gravel or rocks that allow drainage. You can also use plastic bottles if you want to do some recycling. The bottom layer should keep the holes created between the bricks open allowing any excess water to seep out.
Once that’s done, you can fill the planter the rest of the way with any potting soil you like to use. Plant the foliage of your choice and your work is done. Congratulations!
FAQs
Should I line my brick planter?
It’s not necessary to line a brick planter. Bricks are very durable and will be just fine in the constantly moist environment created by the soil.
You Might Also Like: Waterproof Liner For Planter Boxes
Can you stack bricks without mortar?
You can, but your brick wall will be unstable and pushed out of shape once filled with soil. If you don’t want to use mortar, then it’s best to keep your planter to a maximum of two bricklayers high. Any higher becomes a risk.
Are bricks safe for raised planters?
Yes, as long as you use mortar and make sure the bricks are laid properly. Just make sure to not exceed 600 mm in height. After this point, the brick wall weakens and may be pushed out of shape by the weight of the soil.

Save this pin for later


When building a brick planter and flower bed, what does one do to avoid the structure from blowing under the pressure of the soil ? Is there a structure or some sort of mitigation to avoid this happening? Should the bottom be covered in stones before soil is laid?